 |
 |
 |
 |
Use your CNC router, CNC mill, or CNC plasma cutter to
cut sign vinyl just like a professional sign shop plotter - without buying additional equipment or learning new software. Blade pressure can be adjusted for cutting sign vinyl in any thickness as well as sandblast mask, paper, cardboard, and plastics up to 1/32” thick. We recommend using the 60 degree blade (Sold Separately) when cutting materials other than sign vinyl.
Our CNC Sign Vinyl Drag Knife bit fits in any 1/4" collet, just like a regular end mill. Instead of rotating and cutting like an end mill, the bit allows your CNC machine to cut adhesive backed sign vinyl and other thin materials with the spindle TURNED OFF. The spring-loaded bit holds a tiny carbide knife that swivels as your
CNC machine drags it around the profile of your design. Inside
the bit, pressure on the blade is precisely controlled, allowing the
knife to cut through sign vinyl without cutting through its wax paper
backing. The bit is designed to compensate for tables that are not perfectly flat.
Comes complete with everything you need to start cutting sign vinyl, including the floating-head blade holder, 45 degree carbide blade, and detailed directions on how to create your cut files, how to set your bit height / Z=0 level, and recommended feed/speed rates. (Mounting bracket required for use with CNC plasma cutters is NOT INCLUDED.)
|
Common Applications for Our CNC Vinyl Drag Knife Bit
|
-
Make professional quality signs, banners, magnets
-
Create lettering, logos, and graphics for cars and trucks
-
Use vinyl stencils/masks to paint models + etch frosted glass
-
Cut paper, cardboard, and matting for picture frames (must be less than 1/32” thick)
-
Cut thin plastics (overhead transparency, laminating material, etc.)
|
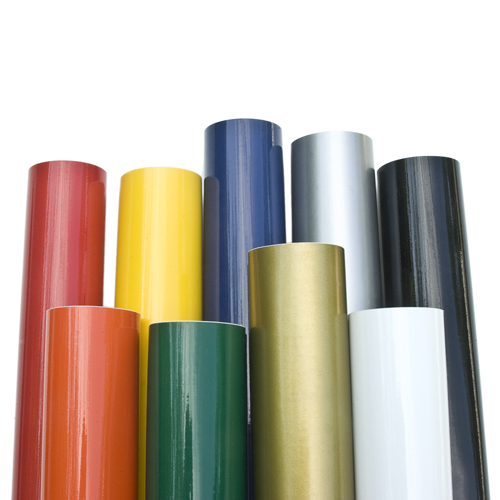
| Sign vinyl is basically industrial strength contact paper that is designed to be cut into lettering and graphics by a computer. It comes in 100s of standard colors and is sold in rolls up to 48” wide. Once the vinyl is cut, letters and graphics can be applied to any smooth, non-porous surface - metal, plastic, glass, painted wood, etc... using a simple "transfer tape" process. (See instructions below for more details.)
|
(Click to Enlarge)
|
|
|
Cut Sign Vinyl with Your CNC Machine in 3 Easy Steps
|
-
STEP 1: Create your CAD/CAM file (G-Code) using the same software and methods used to create standard 2-D cut
files. (Detailed instructions on creating cut files, including
recommended feed / speed rates, are included with the bit.)
-
STEP 2: Secure your sign vinyl to the spoilboard with vacuum pressure, single or double-sided tape, or temporary spray adhesive. Insert the CNC Sign Vinyl Drag Knife Bit in your 1/4" collet (router/mill) or mounting bracket (plasma torch) and set your bit height / Z = 0 level.
-
STEP 3: Run your cut file to create your lettering/graphic. The spring-loaded bit holds a tiny carbide knife that swivels as your
CNC machine drags it around the profile of your design. Inside
the bit, pressure on the blade is precisely controlled, allowing the
knife to cut through your sign vinyl without cutting through its wax paper
backing.
|
|
Applying Sign Vinyl Cut with Your CNC Machine
|
(Click to Enlarge)
|
-
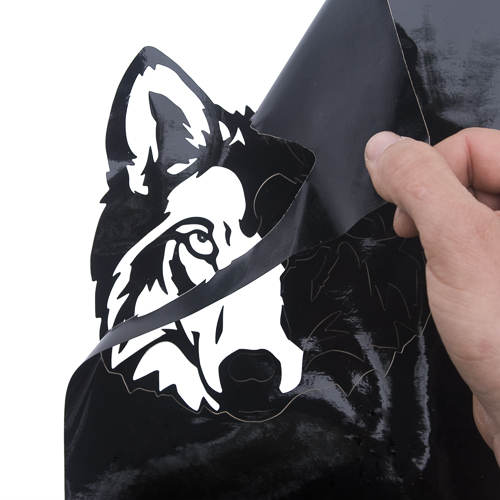
Step 1: Weed Out Unwanted Sign Vinyl
-
Remove the unwanted pieces of vinyl that lie in between and around your letters/graphic. Using the tip of an X-acto knife, prick the unwanted vinyl about 1/8” inside the cut line and then lift the edge of the vinyl up. With your free hand, pull the vinyl off the rest of the way and set it aside.
|
(Click to Enlarge)
|
-
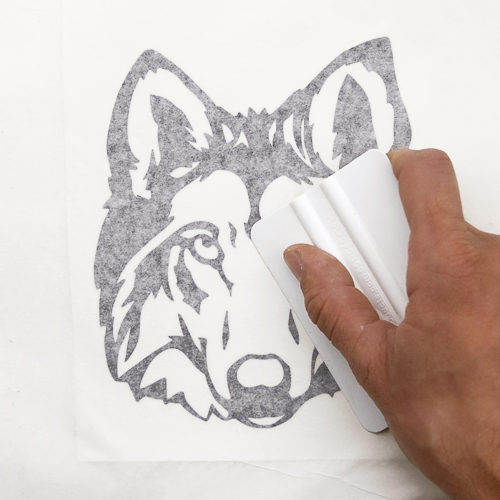
Step 2: Apply Transfer Tape to the Sign Vinyl
-
Apply “transfer” tape to the sign vinyl/wax paper using a rubber squeegee. Lower the tape onto the vinyl slowly, smoothing out the tape as you go to avoid wrinkles and air bubbles. Squeegee over the entire sign again, this time with more pressure, to help the transfer tape adhere to the vinyl.
|
(Click to Enlarge)
|
-
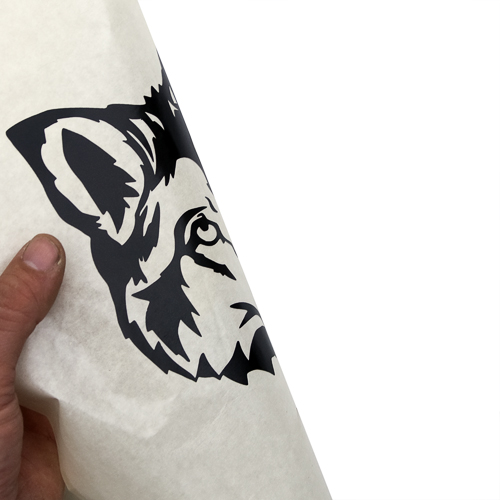
Step 3: Remove the Wax Paper Backing
-
Remove the wax paper backing from the transfer tape/sign vinyl. The transfer tape keeps all the parts of the graphic aligned relative to each other and transfers the sign vinyl from the wax paper backing to the finished part in one easy step.
|
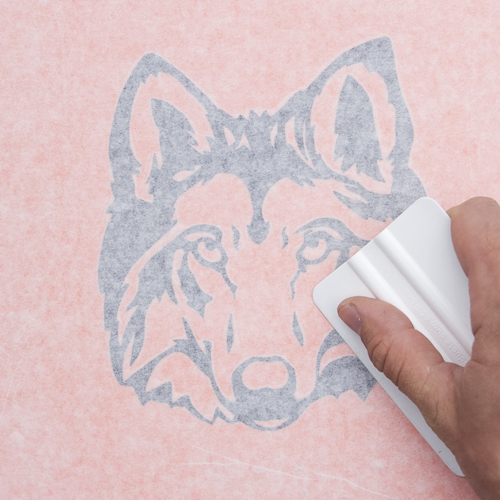
(Click to Enlarge)
|
-
Step 4: Transfer the Sign Vinyl to Your Sign
-
Apply the transfer tape/sign vinyl to you sign blank or base material. Squeegee the transfer tape/sign vinyl onto the blank as described in Step 2 - making sure that you avoid wrinkles and air bubbles.
|
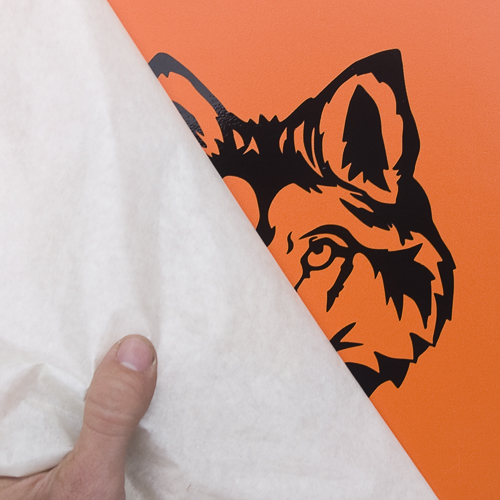
(Click to Enlarge)
|
-
Step 5: Remove the Transfer Tape
-
Starting at one corner, peel off the transfer tape to reveal your sign vinyl graphics. Pull the transfer tape diagonally toward the opposite corner, folding the tape back onto itself as you pull.
|
|
|
Common CNC Vinyl Drag Knife Questions & Answers
|
-
What's Included with Our CNC Sign Vinyl Drag Knife Bit:
-
-
Spring-loaded, "floating head" style bit
-
45 Degree carbide blade (60 degree blades are Sold Separately)
-
Hex wrench for replacing worn blades
-
Detailed step-by-step instructions on creating your cut files, setting your bit height / Z=0 Level, and securing sign vinyl on your spoilboard
-
Introduction to sign making techniques, including tips and tricks from professional sign makers on how to weed sign vinyl and an explanation of how the transfer tape process works.
-
What Else Do You Need To Get Started Cutting Sign Vinyl:
-
-
CNC router, CNC milling machine, or CNC plasma cutter with 1/4" collet or mounting bracket
-
Standard CAD and CAM software for creating your vinyl cut file
-
Spoilboard surfaced flat to +/- 0.015". The bit is designed to compensate for warped material and tables that are not perfectly flat
-
Vacuum table, single or double-sided tape, or temporary spray adhesive to hold the sign vinyl to your spoilboard while cutting
-
X-acto knife for weeding unwanted vinyl from the wax paper
-
Sign maker's "transfer tape"
-
Replacement Parts / Maintaining Your CNC Sign Vinyl Drag Knife Bit:
-
-
The carbide blade included with our drag knife bit is manufactured to last a long time before it wears out. Individual results will vary based on your cutting pressure and the hardness of the material you cut.
-
Carbide tools are extremely hard, but they are also brittle. Dropping the bit onto a concrete floor may damage the carbide blade. If you're the type of person
who likes to keep a backup on hand, or if you find that your blade is worn or damaged, replacement blades are available in our Replacement
Blades, Tips, Pens, etc. section.
-
What Materials Can Our CNC Sign Vinyl Drag Knife Bit Cut?
-
-
Blade pressure on our CNC Sign Vinyl Drag Knife Bit can be adjusted for cutting sign vinyl in any thickness as well as sandblast mask, paper, cardboard, and plastics (up to 1/32”
thick.) We recommend using a 60 degree blade (Sold Separately) in our Replacement
Blades, Tips, Pens, etc. section.) when cutting materials other than sign vinyl.
-
Will Our CNC Sign Vinyl Drag Knife Bit Work with Your CNC Machine?
-
-
Our CNC Sign Vinyl Drag Knife Bit is compatible with most CNC routers, CNC milling machines, and CNC plasma cutters. It fits in any 1/4" collet, just
like a regular end mill. Instead of rotating and cutting like an end
mill, the bit allows your CNC machine to cut adhesive backed sign vinyl and other thin materials with the spindle TURNED OFF. The spring-loaded bit holds a tiny carbide knife that swivels as your
CNC machine drags it around the profile of your design. Inside
the bit, pressure on the blade is precisely controlled, allowing the
knife to cut through sign vinyl without cutting through its wax paper
backing.
-
If you use a CNC plasma cutter (or your spindle is too small for 1/4" shank bits) you can attach our CNC Sign Vinyl Drag Knife Bit directly to your Z-axis for cutting. The easiest way to accomplish this is to create a bushing that slips over the bit and fits into your current torch/spindle mount. Some customers modify their mounting bracket to hold the bit at an offset from the standard cutting head, allowing them to cut vinyl without removing their torch/spindle.
-
Can Your CAD/CAM Software Create Cut Files for Our Drag Knife Bit?
-
-
Cut files (G-Code) for our CNC Sign Vinyl Drag Knife Bit can be created using the same software and methods used to create standard 2-D cut files. While some software packages offer built in engraving or V-Carving options, standard profiling operations will work just as well. Detailed instructions on creating cut files, including recommended feed / speed rates, are included with the bit. Make sure that your cut path does not cross any open holes or pockets in your spoilboard - the spring-loaded knife tip will drop into the
hole and could be damaged.
-
How Do You Set Z = 0 with Our CNC Sign Vinyl Drag Knife Bit?
-
-
Electrical sensors and touch plates used for setting Z-axis values with standard end mills should work with our CNC Vinyl Drag Knife Bit. You can also set your bit height / Z=0 level manually by slowly lowering your Z-axis while sliding a piece of paper back and forth across the top of your part. When your bit reaches the top of your part (Z=0 point,) it
will pinch the paper against the part's surface and the paper will
stop sliding. Set Z=0 in your control software and you're ready to start cutting vinyl.
-
How Do You Hold Sign Vinyl On Your Spoilboard for Cutting?
-
-
The easiest way to hold sign vinyl to your spoilboard is to tape it down using single or double-sided tape around the edges. If you're cutting larger pieces of sign vinyl or you're cutting serveral pieces of vinyl in a row, you can use temporary spray adhesive to speed things up. The temporary spray adheasive will make your spoilboard sticky like a Post-It note, allowing it to grab onto the vinyl's wax paper backing. Vacuum tables are also great for holding sign vinyl, as long as the surface of your spoilboard is smooth and not full of cuts or holes. (The bit is designed to compensate for tables that are not perfectly flat, but the surface does need to be smooth to avoid jagged/interrupted cuts.) If your spoilboard is not smooth, just clamp a fresh piece of MDF or melamine on top of your spoilboard and mount the sign vinyl to it.
|
|
|
 |
 |
 |
 |
|
 |

| Accessories for This Product... |
|
|
|

|